
A Rookie’s Race-Day Plan for Tsukuba 2000 Full in the Ray FF1600
A corner-by-corner iRacing guide to the Tsukuba 2000 Full layout in the Ray FF1600. Built for rookies: clean lines, safe SR, and lap time found in momentum and exits.
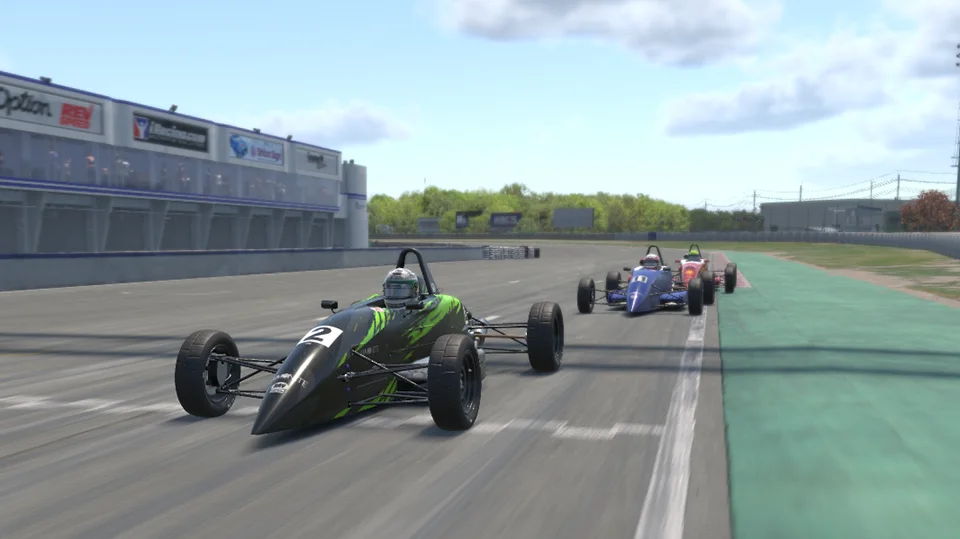
The Ray FF1600 at Tsukuba 2000 Full is a short, momentum-sensitive fixed-setup combination. Course 2000 is just over 2 km with 14 turns, so a missed entry or a ruined exit comes back around within a minute. iracing
Quick Summary
The FF1600 has no wings, runs treaded tyres, makes roughly 110 hp, and lives on mechanical grip. Braking, throttle, steering smoothness, curb strikes, and weight transfer all show up in the lap time. iracing
Fast laps come from:
- Braking firmly while the car is straight, then bleeding pressure off as steering lock builds.
- Trail braking to keep load on the front and rotate the car, instead of adding steering angle.
- Protecting momentum through the short, linked sections.
- Choosing late apexes where they clean up the exit.
- Getting back to full throttle decisively once the car is rotated, rather than sitting on partial throttle and inducing power understeer.
- Staying off the inside curbs that upset the low, light chassis.
Consistency comes from a repeatable brake release, clean apexes, exits that need no steering correction, and enough margin to survive side-by-side racing. Maximum entry speed matters less than any of them.
Car Overview: Ray FF1600
The Ray FF1600 is a four-speed, rear-wheel-drive Formula Ford with an H-pattern gearbox. iRacing’s Max Esterson notes that it has no wings, so turbulent air costs you very little and you can follow closely. Treaded tyres and no downforce mean the car slides, and you control it with your hands and feet rather than by managing aero grip.
What the car rewards
- Brake-led rotation. Hold brake pressure longer than you would in a downforce car to keep load on the front tyres. Esterson calls it “steer with the brakes.”
- A small, controlled slip angle. Some movement is normal. Big slides cost speed and overheat the tyres, and Coach Dave Academy warns that sliding reduces grip in iRacing. coachdaveacademy
- Prompt throttle commitment. The open differential creates understeer once power arrives. Get to full throttle quickly after the car is pointed for exit instead of feeding it in gradually.
- Clean downshifts. A small throttle blip on downshifts keeps the rear settled. Upshifts need no clutch, only a small lift. iracing
What it punishes
| Driver error | Car response | Driving correction |
|---|---|---|
| Releasing the brake too early | Front unloads; the car resists rotation | Carry lighter brake pressure farther toward the apex |
| Holding too much brake with large steering lock | Rear becomes unstable | Bleed brake pressure off smoothly as steering angle builds |
| Stabbing at throttle before rotation is complete | Open-diff power understeer | Finish the turn first, then commit decisively |
| Missing a downshift blip | Rear instability | Blip consistently, or use the relevant iRacing driver aid |
| Clipping inside curbs | Car is pushed off the apex or unsettled | Use painted edge and curb only when the chassis stays settled |
The car has no ABS and no traction control, so nothing will rescue an over-aggressive brake or throttle input. None of the sources here confirm that brake bias is adjustable in the Ray during a fixed race, so treat the balance as given and fix problems with brake release, turn-in timing, line choice, and throttle timing.
Track Overview: Tsukuba 2000 Full
The lap runs under a minute in published FF1600 guide footage, which leaves no room to recover from one slow sequence before the next braking zone arrives.
Several corners load the car through camber or a crest. Erilla’s fixed-setup guide picks out the uphill first turn, the cambered Turn 3 area, a fast lift section, a right-hand sequence, and the final corner as the parts of the lap that decide your time. youtube
Passing and incident zones
The most practical passing opportunities are:
- Into the final corner, if the run through the preceding section gives you overlap before braking.
- Into Turn 1, if you exit the final corner well and hold a controlled overlap.
- Anywhere you can build a draft and a side-by-side run rather than diving late from too far back.
Erilla’s guide frames the straight before the final corner as a choice between passing into the final turn and setting up for Turn 1.
Do not force a pass in the linked, cambered right-hand sections. Those corners leave the outside driver no time to recover from contact, a missed apex, or a curb strike.
Track limits and curbs
Use all the legal exit surface, but only when the car stays settled. Erilla’s guide recommends outside curb at Turn 1, the fast lift corner, the right-hand sequence, and the final-corner exit, and warns against striking several of the inside curbs.
An extra centimeter of exit road is worth having only if it costs you no slide, wheelspin, curb bounce, or invalid lap.
Beginner Tips
- Build a repeatable braking routine before you hunt for deeper entries: hard initial brake in a straight line, then a smooth reduction as you turn.
- Make one steering input per corner. Repeated corrections scrub speed and make the FF1600 unstable.
- On Lap 1, brake earlier than your solo marker. The field compresses fast into Turn 1 and the final corner.
- Prioritize your exits from the final corner and Turn 1. They feed the longest acceleration phases on this compact lap.
- Leave room alongside. The FF1600 can run close because there is almost no aero wake, but open-wheel contact still ends races.
- If you miss an apex, do not force the car back to it with more steering. Open the wheel, take the safe exit, and protect the next braking zone.
- Practice with stable fuel and weather. Garage 61 recommends matching your ghost lap’s conditions as closely as you can, because temperature changes performance. garage61
Corner-by-Corner Guide
The reference points below come from Erilla’s fixed-setup Ray FF1600 Tsukuba guide. Treat the visual references as starting points rather than absolute braking points: speed, tyre condition, track temperature, fuel, draft, and traffic all change your braking distance. youtube
Turn 1: Uphill right-hander
Approach: Start fully left. The guide uses the solid fencing on the left as the braking marker.
Entry: Brake hard, then trail the brake toward the apex. The car climbs and crests mid-corner, so bleed pressure off as the grip changes over the crest. Tyres lock easily as the car goes light.
Line and apex: Apex in the final third of the corner. That opens the exit and lets you get to throttle earlier.
Exit: Pick up the throttle at the apex rather than slamming it open while the car is still loaded. Use legal outside curb if the car stays stable.
Common errors:
- Braking too late over the crest.
- Releasing the brake before the car rotates.
- Turning in too early and arriving at the exit curb with steering still applied.
- Entering from the middle of the road and losing radius.
Traffic: If you are defending, take the inside early and brake conservatively. Do not move back toward the racing line once another car has overlap. If you are attacking, build the overlap with your exit from the final turn, before the braking phase.
Turn 3: Cambered, crest-sensitive corner
Approach: The guide uses the end of a dirt patch as its brake reference. Brake hard and hold pressure to the apex.
Line: The corner has camber and a small rise. Rotate with the brake, and avoid a sudden steering input over the elevation change.
Throttle: The guide picks the throttle up around the middle of the two signs and reaches full throttle as the camber supports the car.
Curb: Stay off the inside curb. This is where the guide sees drivers spin.
Time gain: Do not chase a dramatic slide. A narrow, disciplined rotation that lets you go to full throttle sooner is faster and safer.
Turn 5: Fast lift and exit curb
Approach: No braking here. The guide lifts to roughly 15–20 percent throttle.
Line: Take the shortest route that does not scrub speed. Aim for the middle apex and take only a small amount of curb.
Exit: Back to full throttle from the apex, and let the car run out to the outside curb.
Common errors:
- Treating it as a full-throttle corner before the car is positioned.
- Making a big lift and losing momentum.
- Pinching the exit and forcing a steering correction.
Traffic: Do not turn an inside overlap into a late squeeze. A compromised exit here leaves you vulnerable into the next braking zone.
Right-hand sequence: Late apex, then cambered exit
Approach: The guide brakes where the white line becomes straight again. Brake hard, then trail toward the first right-hander.
Line: Late apex in the first part of the sequence. The guide’s apex reference sits near the start of the second right-hander, which straightens the exit.
Throttle: Use the camber of the second right-hander to reach full throttle while keeping off the inside curb. Take legal exit curb only once the car is stable.
Common errors:
- Turning into the first right too early.
- Hitting the inside curb in either right-hander.
- Asking for full throttle before you have started unwinding the wheel.
Traffic: A poor place for a speculative inside pass. Follow closely, force a defensive line if you need to, and carry the better exit toward the final-corner braking zone.
Final corner: Exit onto the main straight
Approach: The guide brakes about one car length before the blue barrier and padding on the left. Downshift to third for stability.
Entry: Brake enough to get the car turned, and add trail braking only as needed. A late-third apex straightens the exit.
Exit: The guide’s target is full throttle as the car approaches the curb, using all the legal exit surface and the Astroturf.
Racecraft: This is a primary passing zone. Base an attempt on overlap you established before turn-in, not on a late lunge after the leader has committed. If the pass will not be finished at the exit, take the stronger exit and attack into Turn 1 instead.
Advanced Driving Techniques
Trail braking without over-rotation
Use brake pressure to load the front, then release it in proportion to increasing steering angle. Load the front tyres enough that they accept turn-in while the car stays aligned for exit. Forcing the rear loose is not the point.
Check the shape of your brake release in replay or telemetry:
- A sudden jump from heavy braking to zero brake usually produces understeer at turn-in.
- Heavy brake still on deep into the corner with too much steering makes the rear unstable.
- A smooth taper lets you make a single, deliberate turn-in and cuts out corrections.
Esterson’s advice to hold the brake longer than you would in a downforce car matters most in the slow Tsukuba corners.
Rotation versus steering angle
If the FF1600 understeers mid-corner, work out which input caused it:
- Entry understeer: you released the brake too early, turned in too early, or arrived too fast.
- Power understeer: you got on the throttle before the car had rotated, or the wheel was still too far turned.
- Curb-induced push: an inside curb unsettled the chassis or pushed you off the apex. coachdaveacademy
Try less steering lock, a cleaner brake release, and a later apex before you decide the car needs a setup change. In this fixed race, it does not.
Throttle shaping
The FF1600’s open differential means power application can push the front wide. Once the car is rotated and the steering starts to unwind, move positively to full throttle. Esterson recommends that quick commitment over a long, gradual application, precisely because of the power understeer.
Separate the phases: brake and rotate, unwind, then commit. Full throttle while the front tyres are still turning sharply will only push you wide.
Gearbox discipline
The FF1600 has four gears. Upshifts need only a small lift, and downshifts need a blip if you are not using the clutch. An unblipped downshift will unsettle the rear, especially under trail braking.
Review every spin and snap-oversteer moment. If it happens exactly on a downshift, fix the blip timing before you touch your braking point or your line.
Fixed Setup Strategy
There are no setup changes in this guide. You adapt your inputs to the car’s balance.
If the car feels tight
- Brake slightly longer into the corner to keep load on the front.
- Move your apex later in the corners that lead onto acceleration zones.
- Cut steering angle by slowing the car enough to rotate once.
- Wait until the car is pointed at the exit, then commit, instead of sitting on partial throttle.
- Stay off inside curbs that push the car away from the apex. coachdaveacademy
If the car feels loose
- Smooth out the first brake application and the release.
- Downshift with a consistent throttle blip.
- Use less trail brake once the car has started rotating.
- Avoid abrupt throttle lifts while the car is loaded.
- Give up a little entry speed rather than catching slide after slide.
Tyres and stint management
The FF1600 runs treaded tyres, and excessive sliding overheats them and costs grip. iracing
In a short fixed race, tyre management means avoiding scrub: unnecessary steering lock, repeated corrections, wheelspin, locked tyres, and big slides. Driving deliberately slowly gains you nothing. If grip fades, smooth out your braking and steering before you start moving braking points later.
In-car controls
The car has no wings, no traction control, and no ABS. None of the sources here confirm that brake bias, anti-roll bars, engine maps, or traction control can be adjusted during a race in this fixed configuration. Do not build your race plan around an adjustment you have not found in the iRacing garage or the in-car black box for that session.
Qualifying Strategy
Track position matters at Tsukuba. The lap is short, and several linked corners need either cooperation or a big exit-speed advantage before a pass is possible.
Out-lap
- Build temperature with progressive braking and steering rather than violent weaving.
- Check your brake markers, the grip level, and gear engagement.
- Create enough space that you will not arrive at Turn 1 behind another car.
- Do not ruin the lap by attacking an occupied corner. Back off and build a second gap.
Timed lap
Push hardest where a mistake costs you the whole lap:
- Turn 1 exit.
- The cambered Turn 3 area.
- The fast lift section.
- The linked right-hand sequence.
- Final-corner exit.
Skip the hero braking in the final corner and Turn 1. Losing a tenth to an early brake beats an off-track, a lockup, a spin, or a poor exit that wrecks the lap.
TrackTitan lists a 59.130-second dry reference lap under stated conditions, with 58.2 seconds for its top five percent and 59.7 seconds as a new-driver target. Those are not fixed-series benchmarks: TrackTitan says top-five-percent laps often run custom setups, and weather, fuel, and session conditions all differ. Use them for context, not as targets. youtube
Race Strategy
Start and first lap
- Expect cold tyres and shorter braking distances.
- Leave a margin into Turn 1, especially from mid-pack.
- Hold your lane through the first braking phase. Late swerves create overlap nobody wanted.
- If the driver ahead misses the corner, do not follow them into it. Open the wheel, take a clean exit, and take the position when it is clear.
- A clean first lap is worth more than one position forced through a narrow sequence.
Overtaking
Use exit speed to create the opportunity:
- Prioritize a strong final-corner exit for a Turn 1 attempt.
- If the final-corner attempt is not clean, set up a better Turn 1 exit and keep the pressure on.
- Show the car early, attacking or defending. Late dives into a committed driver’s turn-in path are how you both end up in the gravel.
Erilla’s guide names the final corner and Turn 1 as the two strategic targets on that straight.
Defending
- Defend before the braking zone, not during it.
- Take the inside early when the car behind has a run.
- Brake earlier from a tight defensive line.
- Leave racing room once overlap exists.
- Exit cleanly instead of shutting the door while you are still turning.
Because the FF1600 has no downforce, a driver behind can follow closely and stay in attack range for several corners. Assume they will.
Recovery after a mistake
- Do not rejoin across the racing line.
- Rejoin only when the circuit is clear, and get parallel to the direction of travel first.
- Reset your braking markers for a lap instead of trying to win all the time back at once.
- Use the next clean lap to work out whether the mistake came from braking, turn-in, curb use, downshift timing, or throttle.
Common Mistakes
| Mistake | Why it costs time or causes incidents | Fix |
|---|---|---|
| Braking late and releasing abruptly | The front unloads before the car rotates | Start braking slightly earlier and taper pressure into the apex |
| Carrying a big slide | Scrubs speed and overheats tyres | Rotate with the brake and cut out the steering corrections |
| Early apex at Turn 1 or the final turn | Narrows the exit and delays throttle | Use the late-third apex from the fixed guide |
| Striking inside curbs | Upsets the chassis and pushes the car off the apex | Take the clean line over the aggressive curb |
| Throttle before rotation is complete | Open-diff power produces understeer | Unwind the steering first, then go decisively to full throttle |
| Unblipped downshift | Destabilizes the rear | Blip consistently, or use the iRacing aid |
| Following traffic into an early brake point | Contact or panic avoidance | Brake earlier, offset your car, and protect your visibility |
| Passing in a linked section without overlap | Leaves no space to recover | Build the pass with exit speed and use the final corner or Turn 1 |
Practice Plan
10-minute beginner session
- Drive at a pace where every lap stays on track.
- Use one repeatable braking marker for Turn 1, Turn 3, the right-hand sequence, and the final corner.
- Do not change markers lap-to-lap unless you can explain why.
- Save one clean lap and review it for missed apexes, curb strikes, and abrupt inputs.
Judge the session on how many consecutive legal laps you string together with similar sectors. One peak lap tells you very little.
30-minute focused session
- Five laps on Turn 1 and final-corner exits.
- Five laps on Turn 3: brake release, curb avoidance, throttle timing.
- Five laps on the fast lift and the right-hand sequence.
- A 10-lap stint at controlled race pace.
- Review the two biggest time-loss sections and repeat only those.
Pick one technical focus per run: brake release, apex placement, downshift stability, or exit throttle. Trying to fix all four at once hides cause and effect.
60-minute competitive preparation
- Run an out-lap and two qualifying attempts with realistic track temperature and fuel.
- Run a 10–15 lap race-pace stint with no resets.
- Repeat the stint, deliberately practicing close following and earlier braking in traffic.
- Review one quick clean lap and one representative race-pace lap.
- Finish with a five-lap pressure test: no invalids, no spins, no major curb strikes, and no lap that only survived because you saved it.
Telemetry and ghosts
Garage 61 supports ghost laps and connected telemetry analysis. It recommends training against a complete best lap rather than an “optimal” lap stitched together from your fastest sectors, because an optimal lap can be physically impossible to drive in one go. garage61
In an offline test session:
- Pick a ghost whose conditions are close to yours.
- Start with a ghost about one second faster rather than an unreachable reference.
- Use “Comparison Lap” for a continuous reference, or “Comparison Sector” to reset at each sector.
- Enable “Display reference car.”
- Compare braking onset, brake release, steering trace, minimum speed, and throttle pickup one corner at a time.
Checklist Before Racing
- Set a conservative cold-tyre brake point for Turn 1 and the final corner.
- Find your four references: the Turn 1 left-side fence, the Turn 3 dirt patch, the right-hand-sequence white line, and the final-corner blue barrier and padding.
- Decide from your grid position whether Lap 1 is about survival or about claiming a clean lane.
- Remember the inside curbs that destabilize the car, particularly at Turn 3 and in the right-hand sequence.
- Blip every downshift.
- Build a qualifying gap before you start the timed lap.
- Treat the final corner and Turn 1 as your overtaking sequence.
- If you are not sure you have overlap, yield the corner instead of making open-wheel contact.
Helpful Links and Resources
| Resource | Link | Why it is useful | Limitation |
|---|---|---|---|
| iRacing: Tsukuba Circuit | Official track page | Confirms Course 2000 length and the 14-turn layout | No corner-by-corner FF1600 guidance |
| iRacing: Max Esterson on the Ray FF1600 | Car-control article | Ray-specific braking, throttle, tyre, gearbox, and close-racing advice | General FF1600 instruction, not Tsukuba-specific |
| Erilla: Tsukuba 2000 Ray FF1600 Fixed Track Guide | YouTube guide | Fixed-setup video with visual braking references, apex guidance, curb warnings, and final-corner and Turn 1 race advice | Published in 2023; treat markers as starting points and revalidate in current conditions |
| TrackTitan: Ray FF1600 at Tsukuba 2000 Full | Written guide | Combination-specific guide with video and analysis | May need an account; its reference laps are condition-specific |
| Garage 61 Ghost Laps | Ghost-lap documentation | How to save, load, and train with telemetry-linked ghosts | Ghost laps only work in offline test sessions |
Final Advice
Five habits produce most of the lap time:
- Keep brake pressure into the early part of the corner, then release it smoothly to rotate the car.
- Use late apexes at Turn 1 and the final corner to protect exit speed.
- Stay off the inside curbs in the cambered and linked sections.
- Finish the rotation before you apply exit power, then go to full throttle cleanly.
- Use telemetry or a condition-matched ghost to isolate one braking or throttle difference at a time.
Results come from somewhere else: a clean first lap, conservative braking in traffic, exits that build real passing opportunities, early defensive positioning, and refusing the low-percentage dive in the linked corners.